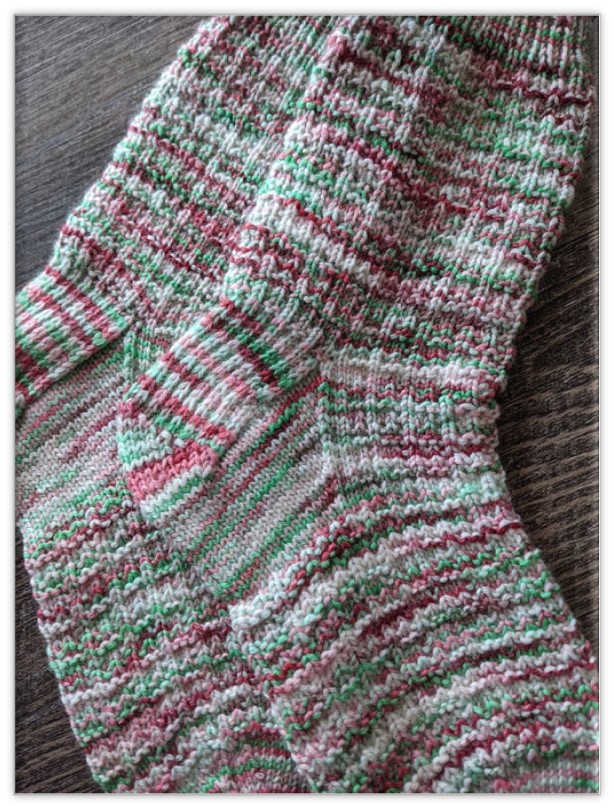
Do you love knitting socks? Have you mastered knitting vanilla socks and want something just a step beyond that? If you can knit and purl, you can do this! These socks are so simple to do and give a subtle ribbing texture.

Important info
Required materials:
Yarn – 100g/462 yd of fingering weight yarn
Sample shown in pictures:
- Soft Sock base in the Everyday Holly colorway from Holly Jolly Fiber Co. (this is KnitPicks Stroll that I had hand-dyed in my old shop)
- 75/25 Fine Superwash Merino/Nylon blend
I highly recommend using a yarn that is a blend of wool + nylon. The nylon helps with the sturdiness of the fiber so that they last you a long time.
Needles – Size US 1 (2.25mm) circular needles on a 32-inch cable for the magic loop method
Notions – Scissors
- Tapestry needle for the Kitchener stitch and weaving in ends
- Stitch marker
Gauge – Approximately 9 stitches per inch in stockinette
Abbreviations and Stitch Information –
Rd – Round
CO – Cast on
St – Stitch
K – Knit
P – Purl
Sl – Slip (purlwise with yarn in the back unless otherwise noted)
SSK – Slip, slip, knit (slip 2 stitches knit wise, then knit them both together through the back loops)
K2tog – Knit 2 stitches together
P2tog – Purl 2 stitches together
Instep – Front and/or top of sock
Sole – Back and/or bottom of sock
Size Information – Small(Medium, Large) with a foot circumference of 8-9” (9-10”, 10-11”). Please note that these are for the circumference of the foot – not the foot length. I recommend allowing for about 1-2 inches of negative ease so that the socks fit well and hug your feet.
Pattern
CUFF
CO 56(64, 72) sts using the long tail cast on method.
Rounds 1-20: (K1, P1) Repeat all the way around.
PATTERNED SECTION
Rd 1: (K3, P1) Repeat to the end of round.
Rd 2: K every st all the way around.
Rd 3: (K1, P1) Repeat to the end of round.
Rd 4: K every st all the way around.
Rd 5: (K1, P3) Repeat to the end of round.
Rd 6: K every st all the way around.
Repeat rounds 1-6 nine and ½ more times, stopping after you’ve worked the last round of the leg across the front of the sock, giving you a total of 59 ½ rounds worked for the leg portion.
You are now ready to begin working along the back of the sock to complete the heel portion.
SLIP STITCH HEEL FLAP
For this portion, you will only be working along the back of your sock. You can just leave the front of your sock be for now.
The slip stitch heel flap will be worked along the 28(32, 36) stitches on the back side of your sock.
Row 1 (RS): (Sl1 with yarn in the back, K1) Repeat to the end of row.
Row 2 (WS): Sl1 with yarn in the front, P to the end of row.
Repeat these 2 rows 14(16, 18) times, until you end up with a total of 28(32, 36) rows on your heel flap.
Now time for some magic!
HEEL TURN
Row 1 (RS): Sl1 with yarn in back, K 14(16, 18), SSK, K1, turn your work.
Row 2 (WS): Sl1 with yarn in front, P3, P2tog, P1, turn your work.
Row 3 (RS): Sl1 with yarn in back, K to 1 st before space, SSK, K1, turn your work.
Row 4 (WS): Sl1 with yarn in front, P to 1 st before space, P2tog, P1, turn your work.
**On the very last time working Row 4, you will PURL the very first stitch, NOT slip it.
Repeat Rows 3 and 4 until all stitches have been worked.
Your last row will be a wrong side row, and you will have a total of 16(18,20) stitches left on the heel turn.
GUSSET
Now you’re ready to pick up gusset stitches!
You will begin working on the back of your sock for the gusset.
K across 8(9, 10) stitches of the heel turn.
Place a marker. This will now count as the beginning of round.
K across the remaining 8(9, 10) stitches on the heel turn.
Pick up 14(16, 18) stitches along the side of the heel flap.
Once you have picked up these, pick up 1 more in the ladder below.
Staying in pattern, K across the instep of your sock.
You are now on the other side of your gusset.
Pick up 1 stitch from the ladder below again.
Pick up 14(16, 18) stitches along the side of the heel flap.
Knit across to the marker.
It’s time to start decreasing!
Don’t forget to stay in pattern along the instep portion of your sock.
Round 1: K to the last 3 stitches before the instep. K2tog, K1.
Follow the patterned portion as you work across the instep.
K1, SSK, knit to the end of round (stitch marker).
Round 2: K all stitches.
Repeat rounds 1 and 2 until you are back to your original stitch count of 58(64, 72).
FOOT
Now that you’re back to your original stitch count, continue working the established pattern until you have reached your desired foot length.
When trying to figure out when you should stop before knitting the toe decreases, subtract about 1.25(1.5, 1.75) inches from the total length that you’re aiming for and stop there.
TOE
Round 1: K1, SSK, K to last 3 stitches before sole begins, K2tog, K1
K1, SSK, K to last 3 stitches before instep begins, K2tog, K1
Round 2: K all stitches.
Repeat rounds 1 and 2 until you have 14(16, 18) stitches left on each needle.
Repeat round 1 over and over until you have 8 stitches left on each needle.
Use the Kitchener stitch to close the toe.


Looks like a great pattern. How can I print it?
Thank you, Patty! I don’t have it in PDF form currently so I would suggest copy/pasting the text into Word or something similar and printing from there.
How do I print patterns?
Hi Florence! To print the pattern, I suggest copying and pasting it into a Word doc or similar and printing it from there.
Hello! Thanks so much for your question about printing. I just sent you an email with the pattern PDF. I hope that helps!
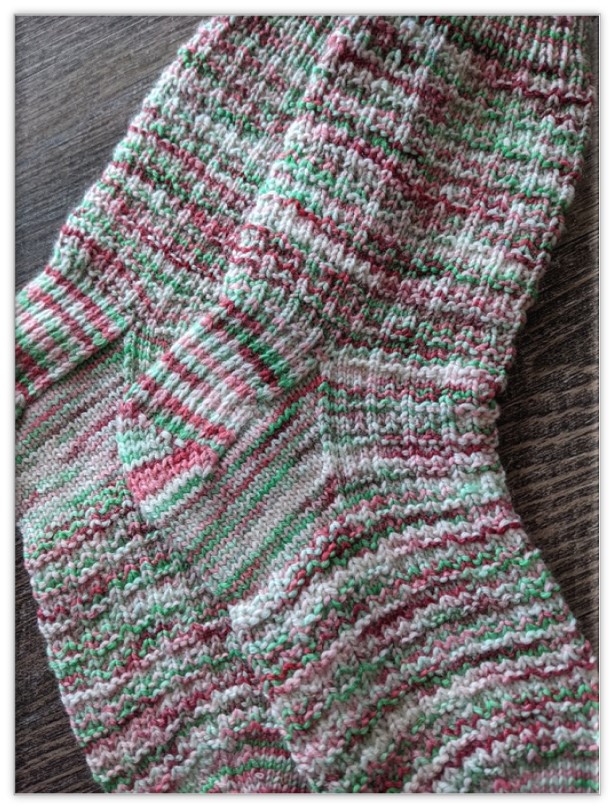
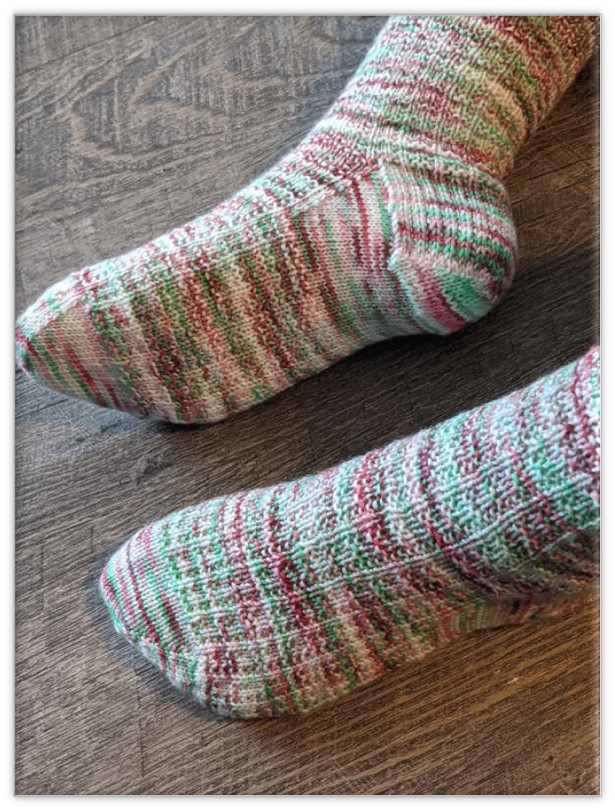
On the picture it seems that you have continued in pattern through the lower foot. But the pattern implies that you only pattern the top half of the foot, leaving the lower part plain.
Hi Christine! The pattern calls for you to continue in the established pattern. If you look at the Foot portion of the pattern it states this, “Now that you’re back to your original stitch count, continue working the established pattern until you have reached your desired foot length.” I hope this helps clear up any confusion. Thank you so much for not only taking the time to check out my pattern, but for commenting as well!
So glad love to learn more i also loved to have a patern on a knitting machine and big sizes if possible.
I just found your knit site. I have sincerely loved resding and looking at photos of your socks. I have knit several pairs of toe up socks. These are so beautiful I am going to try this top down pattern. Thank you!
Roberta Flanders
Hello! Toe up socks has always intrigued me. I have tried them a couple of times but couldn’t wrap my mind around the heel portion so I unraveled and went straight back to top down. lol! Thanks so much for your sweet comment! Happy making!
Do you mind if I quote a few of your articles as long as I provide credit and sources back to your website?
My blog site is in the exact same area of interest as yours and
my users would truly benefit from a lot of the information you present here.
Please let me know if this alright with you. Many thanks!
Go for it! Thank you so much for asking!
Do you have a toe up pattern? I am finishing my first pair of toe up. It makes more sense to me as I like to try on to get a perfect fit. I use magic loop method.
Thanks, Sharon
Hi Sharon! I do not have a toe up pattern as of now. Maybe in the future!